
Add/Modify Messages
On this screen you set up the message an employee receives when they Clock In/Out.
How to get here: Add or Modify button on the Messages screen.
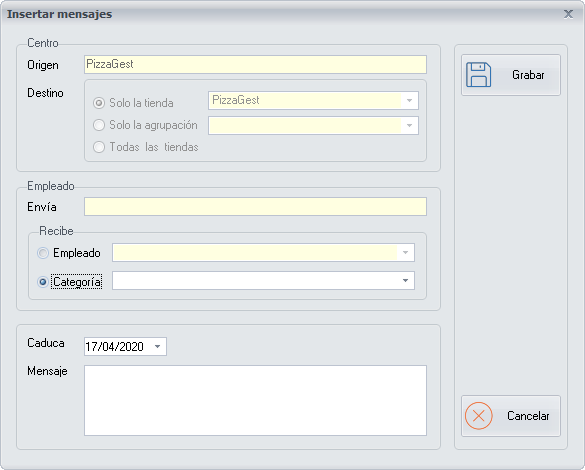
Center
- Source: the branch from which you are generating the message.
- Destination: choose whether you send the message to a single branch (choose it from the drop-down list), to a branch grouping (choose it from the drop-down list) or to all the branches.
Employee
- Sends: the name of the employee who has set up the message. It is the employee who, at the moment of creating the message, is identified in the system through the Restricted options.
Receives
- Employee: tick this option to send the message to a specific employee, and choose them from the drop-down list.
- Professional standing: tick this option to send the message to all the employees with the same professional standing, and choose it from the drop-down list.
Expiry and message
- Expires: the date until which the message appears to the employee or employees you have selected.
- Message: in this text area, write the message that appears on the Pending messages screen to the employee or employees you have selected, when they Clock In/Out.
If the employee validates the message on the Pending messages screen, the message no longer appears to them when they clock in/out, even if the expiry date has not been reached.
Buttons
- Save: click it when you have finished setting up the message.
- Cancel: closes the screen without making any changes.